Friday 30 September 2016


Five on Friday

Wow that week seemed to fly by! I'm joining Amy again today from Love Made My Home and all the other lovely bloggers who post there. Please go and visit them - such talented crafters, photographers and interesting people.

I have another little treat bag that can be made in 5 minutes in 5 or less steps with a 6 x 6 inch piece of paper or cardstock. I will post the last one in the series tomorrow as I will be doing something new next week.

Apologies for the lighting in the photos; it's been a really dull day today where I am. Hope it has been brighter wherever you are.
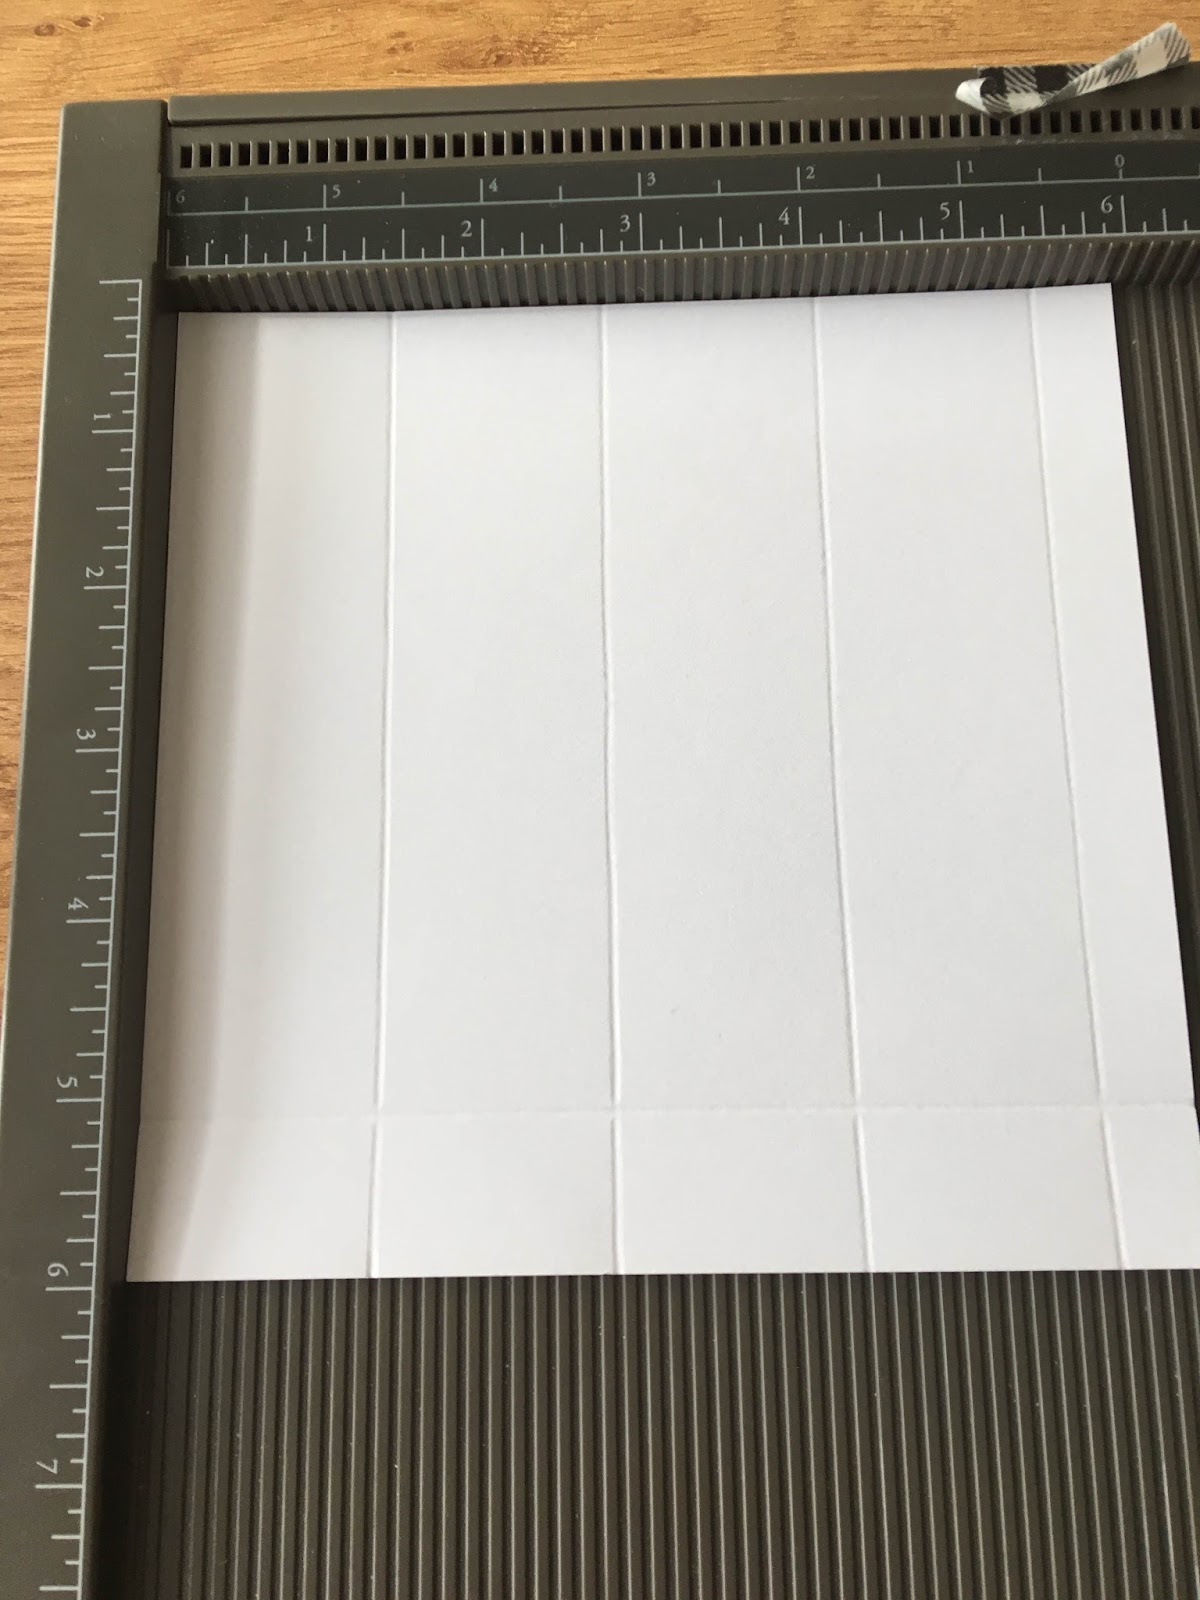


Step 1


Step 1: Place a piece of 6 x 6 inch paper or card onto a scoring tool and score at 7/8, 2-7/8, 3-3/4 and 5-3/4 inches. ( 2.2, 7.3, 9.5 and 14.6 cm)


Step 2


Step 2: Turn the paper 90 degrees and score at 7/8 inch. (2.2cm)
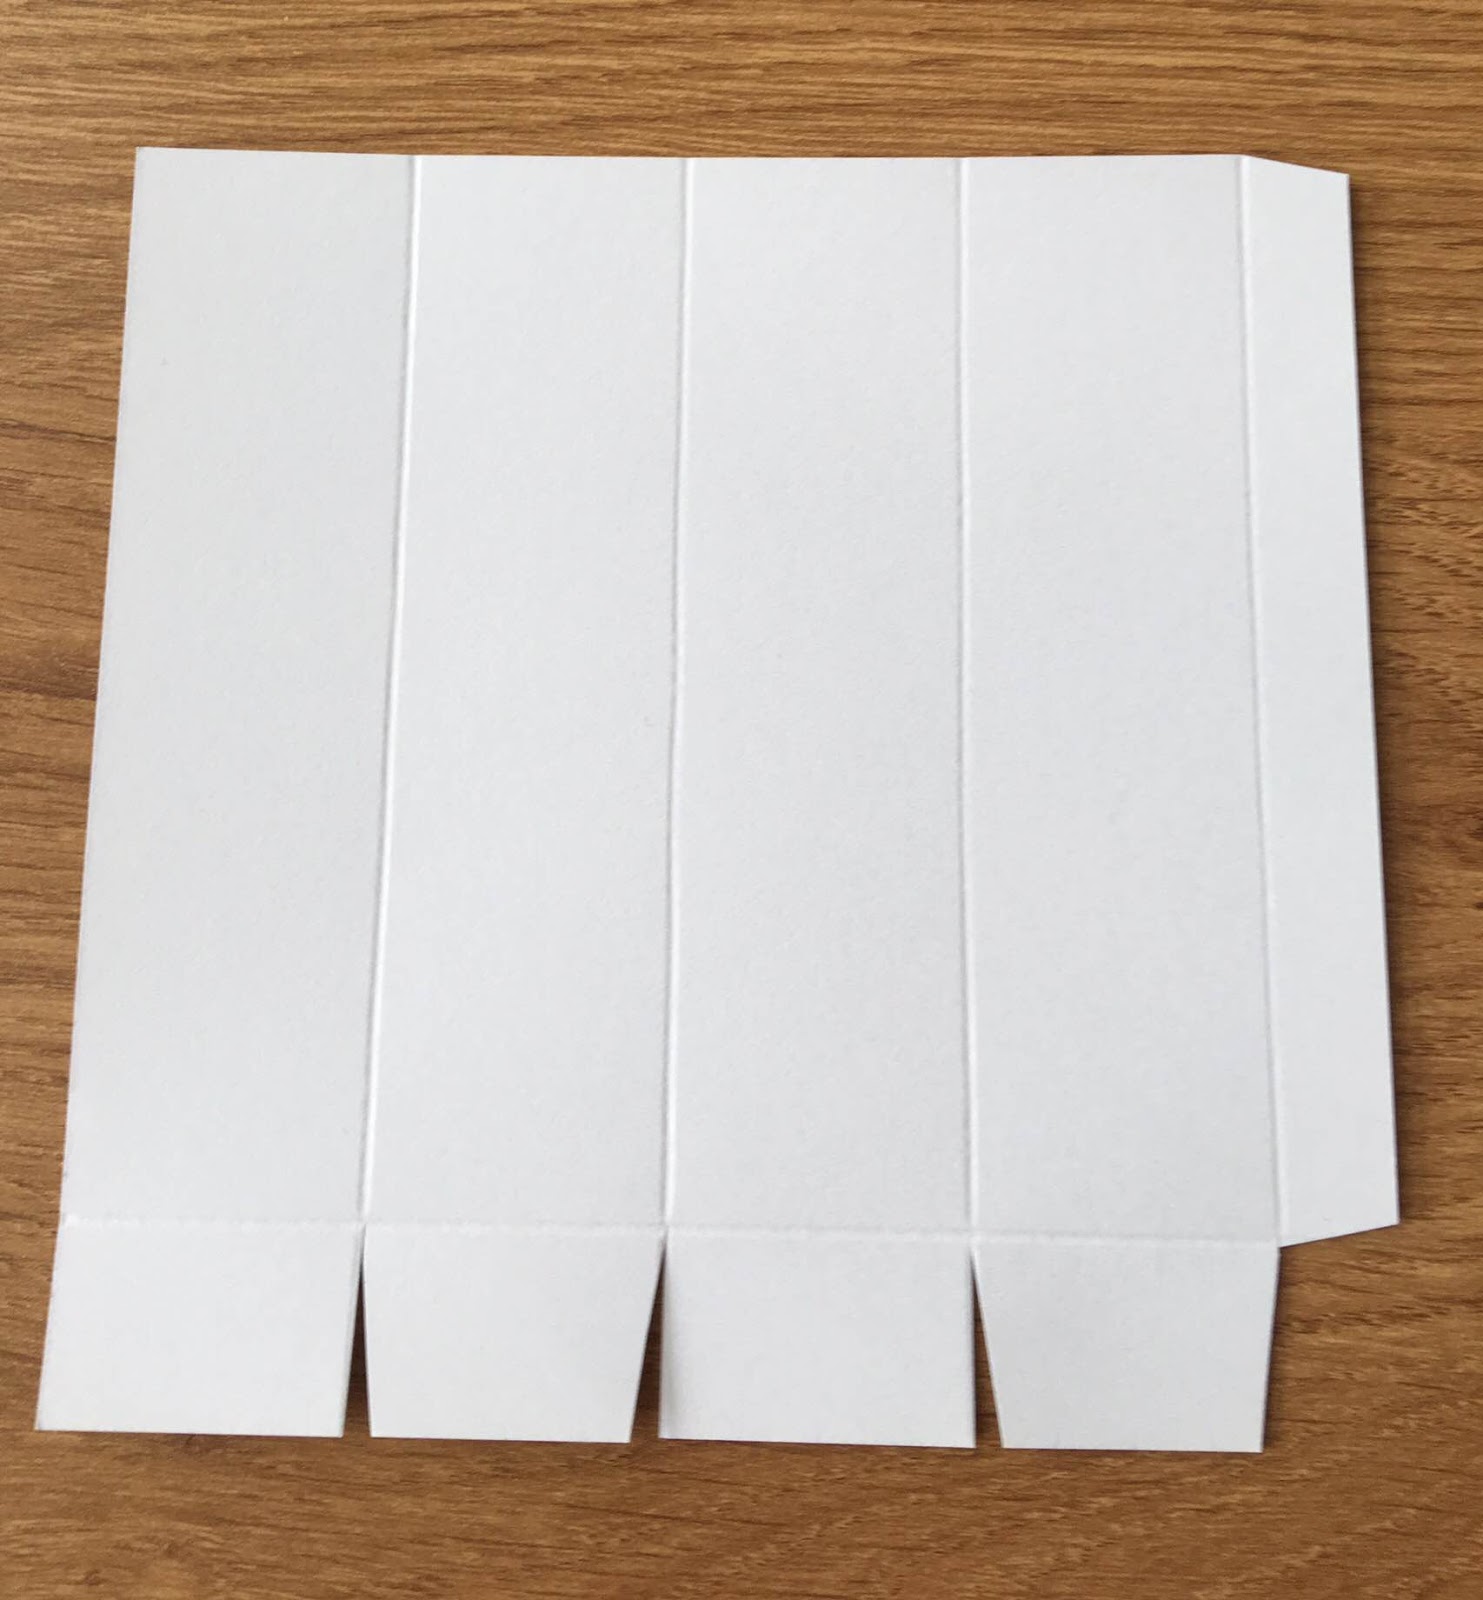


Step 3


Step 3: Fold on all the score lines. Use a bone folder with thicker paper or cardstock for a crisper fold. Cut into the tabs along the narrow end up to the horizontal fold.

Fold over the skinny tab on the side and add glue or double sided sticky tape. Fold over and join the two long sides of the bag.

Add glue/tape to the bottom tab as shown. Fold in the small tabs, then the larger unglued one before the final glued tab to create the bottom of the bag.


Step 4


Step 4: Push in the sides at the top of the bag and pinch.


Step 5


Step 5: To close the treat bag, punch two holes and add ribbon or twine to tie together or use a stapler or mini clothes peg to keep the goodies inside.

The final size of the treat bag is 2 x 7/8 x 5-1/8 inches (5 x 2.2 x 13cm).


I hope you have a go at this little bag. Like all the others they make great thank you or table gifts or even Advent or Christmas tree gifts.

Have a lovely weekend whatever you are doing. Please drop back to see the last treat pouch tomorrow.

Jan x


Friday 23 September 2016


Five on Friday


Rather late today joining Amy from Love Made My Home today. I've been having a few internet problems this week. My apologies for not answering those of you kind enough to write a comment. Hopefully everything will be smoother this week and I'll be able to reply without problem.

Other news this week - I was very excited to hear that I have been accepted onto Crafters Companion design team. So watch out for some projects using some CC items on the blog in the very near future.

This week for Five on Friday is another in the mini-series of treat bags/boxes using 6 x 6 inch paper. Each project made in five minutes in five or less steps.


Step 1


Step 1: Use a scoring tool to score vertically at 1-3/8, 2-3/4, 4-1/8 and 5-1/2 inches. (3.5, 9.5, 10.5, 14 cm Please note that I have rounded to one decimal point for cm).


Step 2

Step 2: Turn the paper 90 degrees and score at 7/8 inch. (2.2 cm)


Step 3

Step 3: Fold on all the score lines. Use a bone folder/paper creaser for thicker paper or card. Cut on the score lines as shown up to the horizontal score line


Step 4

Step 4: After scoring add adhesive to the thinner vertical tab and one of the tabs below the horizontal line.


Step 5


Step 5: Fold up box, sticking the bottom flap last of all. Pinch in two sides at the top of the box and seal with a peg, staple or punch holes and tie with ribbon.

The finished box is approximately 4-1/8 inches tall and 1-3/8 inches square. This is an ideal little box to hold sweet treats, a nail polish or perhaps a mini bottle of something for a little tipple! I will be putting in an individual sachet of coffee, sugar and little biscuits for small thank you gifts.

Hope you give this a try.

Items used in this project:
Dovecraft basics 6x6 inch paper (please note these colours may no longer be available), bone folder and score board both Stampin Up (order online).
Alternative products: bone folder/paper creaser, score board.

New on the blog
From Tuesday 27th September I shall be starting a new mini-series called 'Tools on Tuesday' covering some essential paper crafting tools, particularly for those who are just beginning to paper craft. Hope you can pop over to have a look. If there is anything in particular you would like to see or know more about, please leave a comment below.

Have a fabulous weekend. J x


Friday 16 September 2016

Five On Friday


I have started this blog to share my love of paper crafting. I aim to regularly share projects as well as tutorials of cards, bags, boxes and tags.

Today I am delighted to be joining in with Five On Friday for the very first time with Amy from Love Made My Home. Please go and visit her website to find more Five posts.


This Friday I am going to start a mini-series making treat pouches/bags using 6 x 6 inch paper in no more than 5 easy steps.


Envelope style treat pouch


Step 1

Step 1. Place a piece of 6 x 6 inch (15 x 15cm) paper on a score board or a paper trimmer. Here I am using a Stampin Up score board but there are many different ones available.

Score the paper at 1-1/2" and 4-1/4". (3.8cm and 10.8cm)


Step 2

Step 2.  Turn the paper 90 degrees and score again at 3/4" and 5-1/4"
(1.9cm and 13.3cm).


Step 3

Step 3. Cut away the four corners between the horizontal and vertical lines.


Step 4

Step 4. Trim off the edges at a slight angle so the treat pocket folds neatly.


Step 5


Step 5. Fold on all the score lines and crease with a bone folder or the edge of a ruler. If you use thinner paper you do not need to use a bone folder, just press the edges down with your fingers. I am using 150gsm paper here.

Apply adhesive to the inside edge of the long central flap and the bottom flap.


Completed envelope treat pouch


Add small treats and seal top either with adhesive or punch a hole in the middle and add ribbon and a label/tag.


Items used in this project:
Dovecraft basics 6x6 inch paper (please note these colours may no longer be available), bone folder and score board both Stampin Up (order online).
Alternative products: bone folder/paper creaser, score board.


Thursday 1 September 2016

Blog under construction


This blog is currently under construction. My hobby and obsession is card making and paper crafting. I will be showing you samples of the projects that I make and also some tutorials for making your own distinctive designs.


Please come back soon. In the meantime I will leave you with a few of my past creations.


(To see a larger image please click on photo).


MFT Gnomes Behaving Badly


Gift tags


I saved my brothers bacon with this one!


Scaredy Cats!


Inspired by Jan Brown's tutorial


Teacher gifts - sticky note holders


For all those hard-working teachers out there!


From one old dinosaur to another!